
6 Ways to Add Bleed (and How to Choose the Best One)
Missing bleed is one of the most common problems in print files. Bleed is the extension of the artwork on each side to allow for cutter variance, so it’s an essential part of a good print file. Bleed requirements differ among printers but a commonly minimum is 0.125” on each side.
Many of your clients may not know how to add bleed, leaving the task in your hands. There are several different ways to add bleed. Naturally, each has its own advantages and disadvantages.
We’ll cover them in this article so that you can easily choose the best way to add bleed to your clients’ files.
Adding Bleeding to Your Print Files
1. Release or Remove Masks
Sometimes the bleed is just hidden by a mask that’s set around the edge of the trim area. When you release or remove the mask, it appears, so you’re therefore not truly adding bleed; you’re just unmasking it.
Pros
- It won’t distort the artwork or change image resolution.
- The client may have provided the bleed that they wanted underneath.
- It can be quick and easy if the file is built simply.
- There may not be any bleed hidden after all.
- You risk unmasking other elements that were intentionally hidden.
- Time-consuming if the file is complex with multiple masks.
2. Increase Artwork Size
Another way to add bleed is to increase the size of the entire artwork, or part of it (e.g. the background). This method is most suitable when there are no important elements close to the trim edge.
Pros
- When enlarging the entire artwork, the ratio won’t get distorted.
- It’s a fast and easy fix.
- Most clients won’t be able to tell if their artwork was increased by 1-2%.
- Elements close to the edge may get cut off (e.g. thin borders).
- Enlarging raster images will slightly affect their resolution.
- The client may be able to tell that their artwork was enlarged.
3. Decrease Artwork Size
Similarly, you can shrink the artwork. This leaves a white border. You’re not actually adding bleed, just eliminating the need for one. Alternatively, you may choose to add a color to this border and add bleed to that.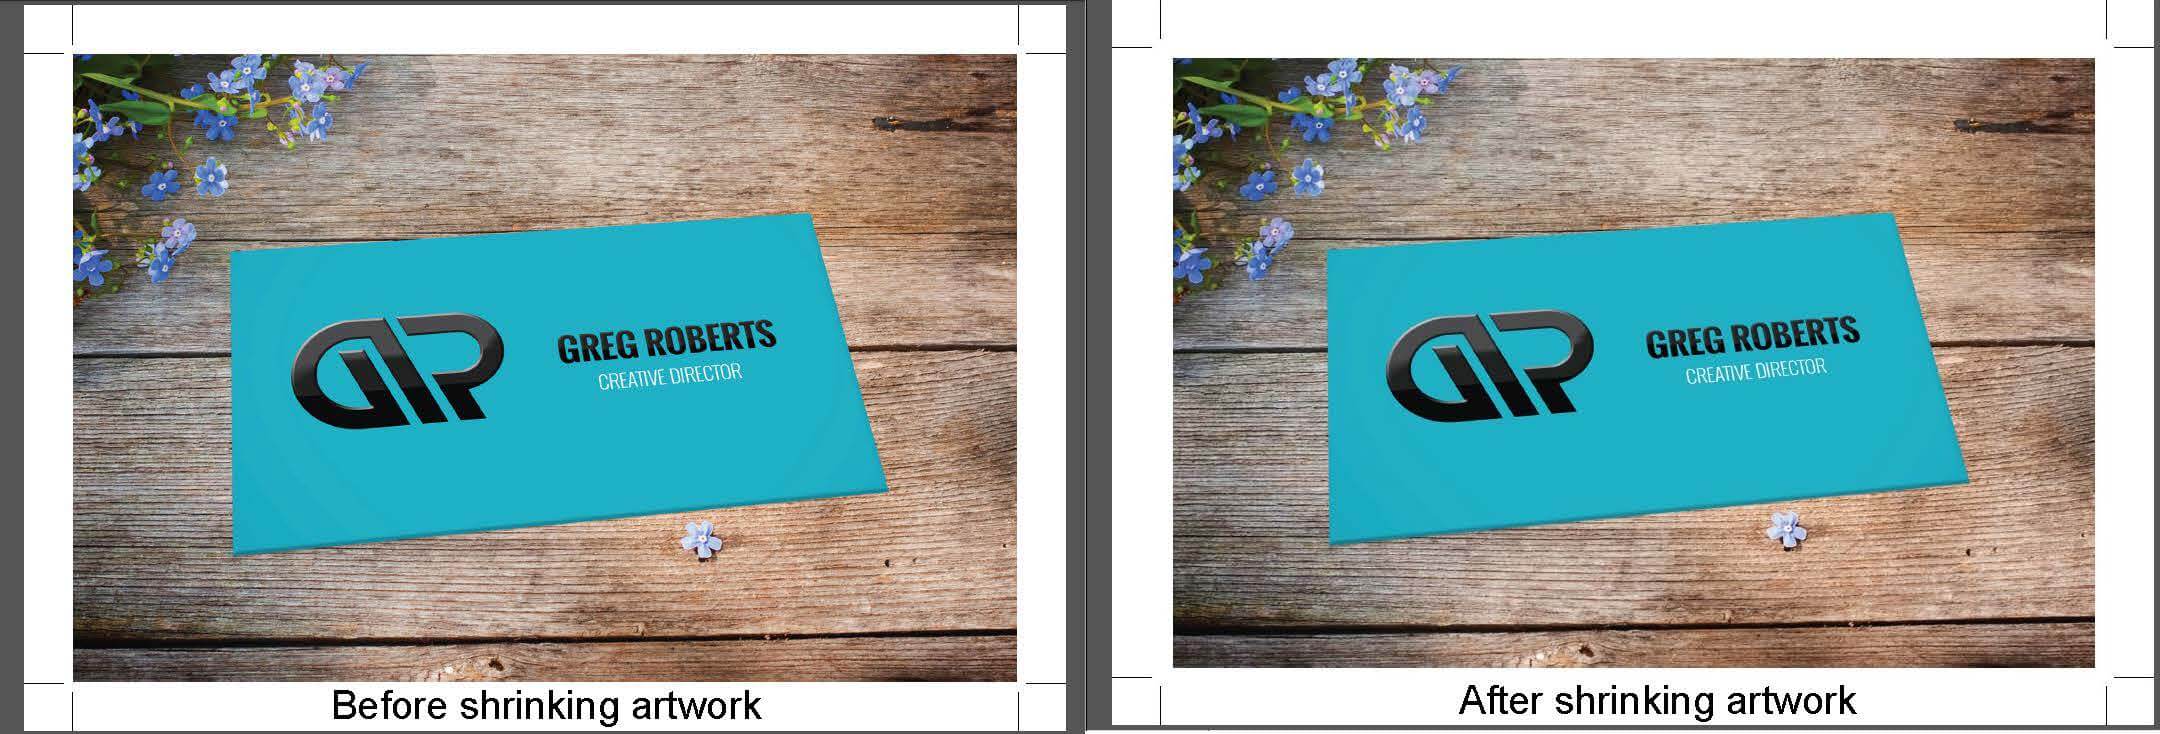
Pros
- It’s a fast and easy fix.
- It actually slightly improves the resolution.
- None of the artwork will get cut off.
- There is a very obvious change in the artwork, which may not be wanted.
- You risk having uneven borders due to both resizing and cutter movement.
- Small type may become harder to read.
4. Stretch Elements
This technique is most suitable when objects that are missing bleed are rectangular vector elements with no curves, as you can easily stretch them out without distortion or pulling parts too close to the edge.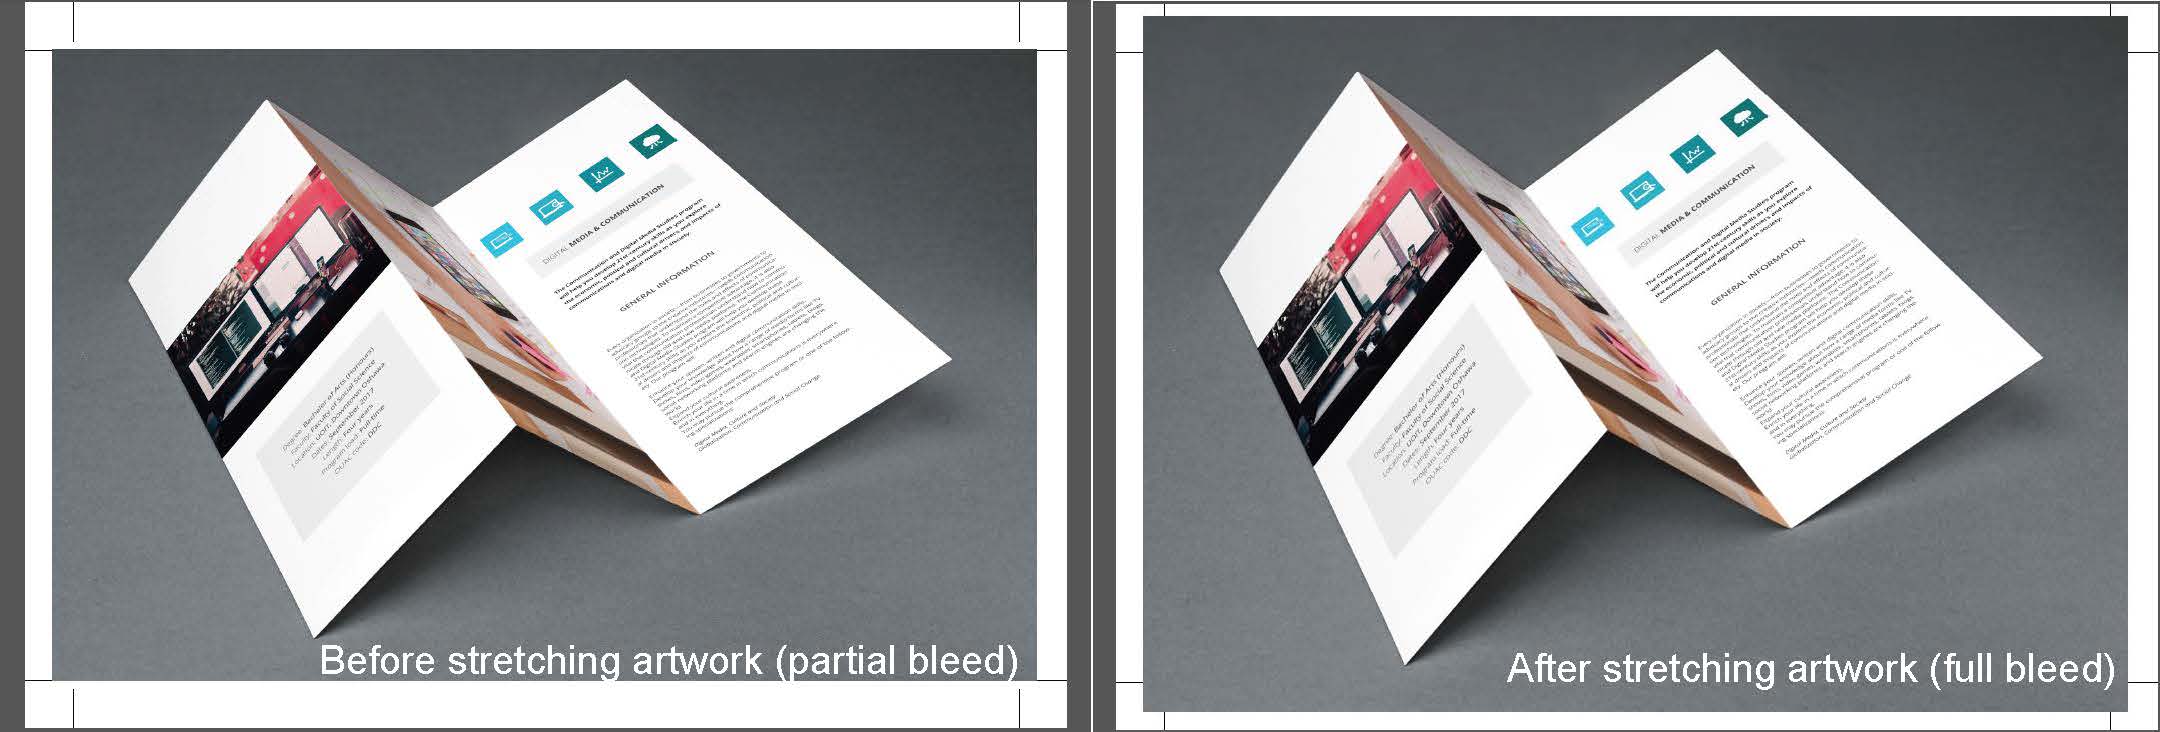
Pros
- It will only impact the element that is getting stretched.
- It can be quick and easy on certain types of artwork.
- Most clients won’t be able to tell if you stretch an unimportant part of the artwork.
- Distortion will occur on non-rectangular vector elements and raster images.
- Parts of the stretched element may get cut off if they’re close to the trim edge.
- You may also have to delete masks.
5. Add Objects
Adding shapes to the bleed area works best when the artwork at the trim edge is a solid color. It’s still possible if it isn’t, but takes much more time. Ideally, you are purely adding bleed and not touching anything else.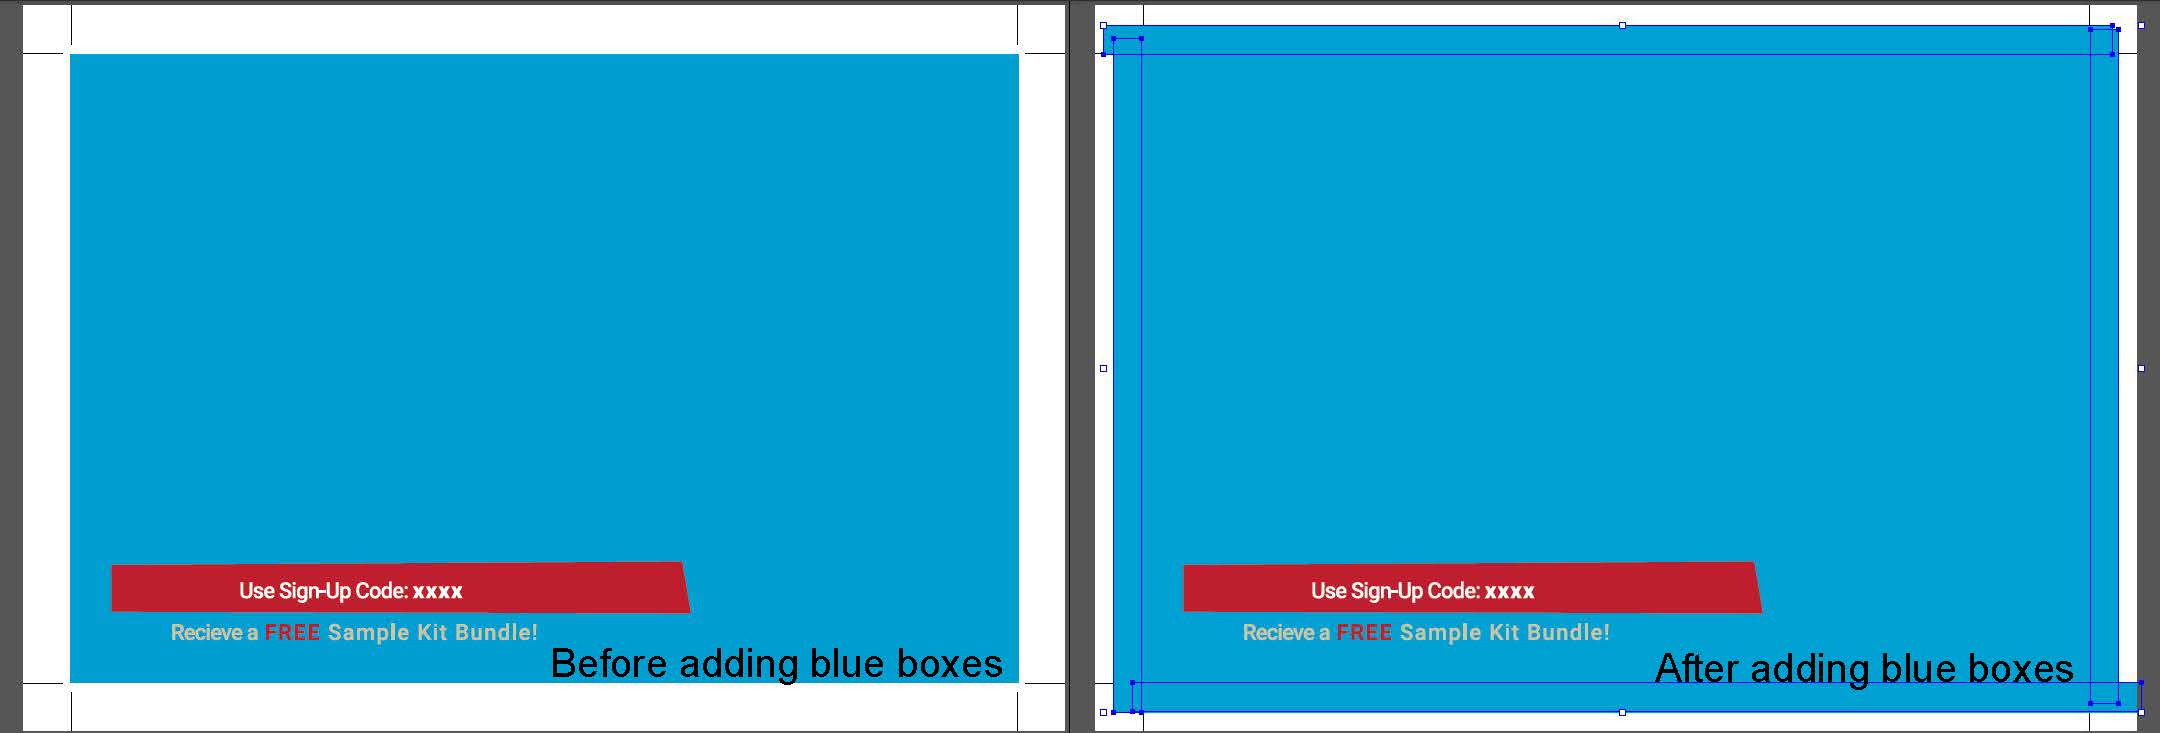
Pros
- You are not changing any artwork within the trim area.
- It can be done using even simple image editing software.
- If done well on the right type of artwork, clients won’t be able to tell the difference.
- The added bleed may not perfectly match the edge of the original artwork.
- It can be time-consuming.
- The difficulty level can be high depending on the artwork.
6. Flip the Artwork
Flipping the artwork at the trim edge to create a reflected mirror image for the bleed is a function available in some programs and plugins. This produces a symmetrical image with the line of symmetry at the trim. There is no hard rule for what works best here, so you may have to test it out to see whether the result visually “makes sense.”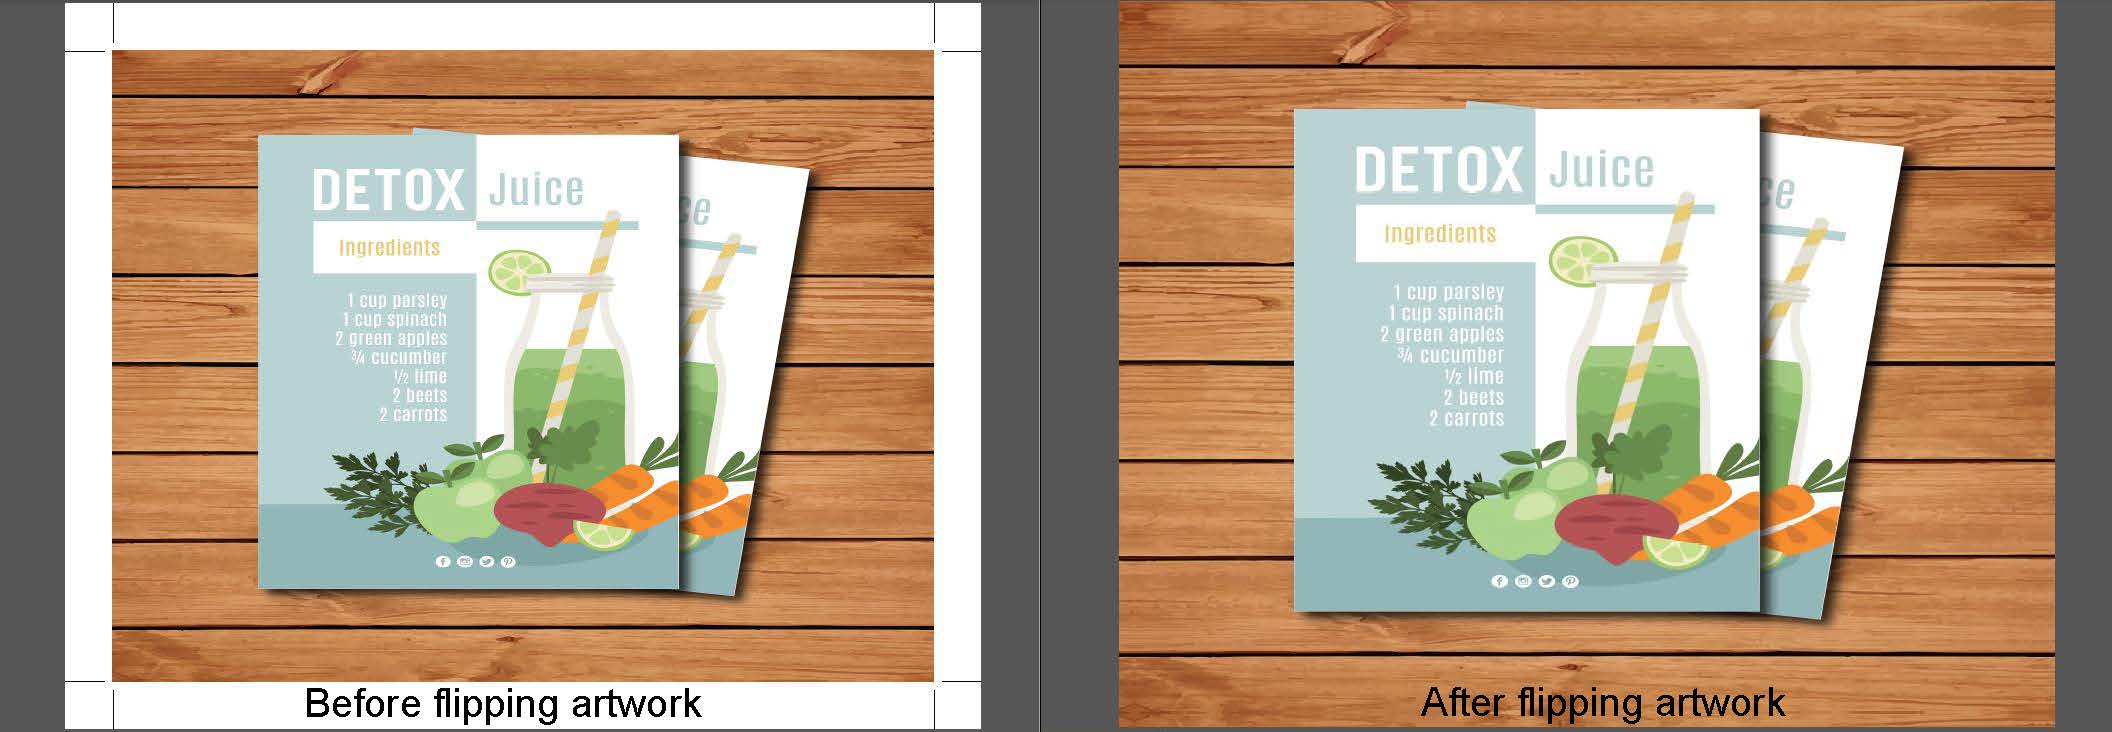
Pros
- With the right plugin/program tool it can be fast and easy.
- It won’t distort or change the artwork within the trim area.
- It matches the same colors and shapes in the artwork.
- It requires a higher level of image editing software/plugin.
- The results may appear nonsensical and not what the client intended.
- It won’t work if there’s a thin border or if the artwork doesn’t fully touch the trim edge.
Conclusion: Using Good Judgement
A good bleed makes a big difference, but not all bleed is good bleed. The methods that we shared here produce different results depending on the nature of the artwork, so always exercise your own good judgment in addition to the tips we’ve provided. Sometimes you may even choose not to add bleed.https://store.printcafeli.com/blog/Print_Cafe_Blog.html


No comments:
Post a Comment